Amazon

Thursday, August 23, 2018

Cranberry Lemon Scones

Cranberry Lemon Scones

Cranberry Lemon Scones will delight your tongue with a bright lemony flavor that is highlighted by small intense bursts of cranberry morsels tucked into each bite!
Y’all, these are seriously so-so good!
SAM_0681
Scones, much like a biscuit in texture are versatile; I’m learning they go with practically anything you decide to put with them.
Savory meat gravies, tomato & herb sauces or sweetened up with choices like strawberries, peaches or as the name implies Cranberry and Lemon!
(BTW, I wouldn’t pass one up with just butter & jam either. Just saying…)
As for the lemon aspect to these; my lifetime lemon meter got tanked off as a kid when I use to suck down lemon juice packets. Rest assured these are not like biting into a lemon wedge or drinking concentrated lemon juice. Not even close! While these lovelies do have the zest of 3 lemons they’re not tart.
Your jaw will not seize up nor will your saliva glands over react. *Yay*
The zest lightens the dough just enough to give it a hint of sunshine.  ðŸ™‚
SAM_0683
The freshness of the lemon followed by varied levels of cranberry 
ending with a sweetened lemon glaze drizzled over the top —
*Holy YUM Moley*
Are you hungry yet?
Well, let’s get baking!

Grab up the following ingredients:
  • 2 1/4 cups A/P Flour
  • 1/3 cup sugar
  • 3 tsp baking powder
  • 1/4 tsp salt
  • 1/2 cup dried cranberries
  • 3 Tsp lemon zest (I used zest f/ 3 lemons packing the 3 Tsp)
  • 1/2 cup butter (cold!)
  • 1 egg
  • 3/4 cup milk
  • GLAZE:  Mix together 1 Tbs milk, 1 Tbs lemon juice & 1/4 c powdered sugar
Directions:
  1. Pre-heat oven to 400 degrees.
  2. Mix egg into your milk; set aside.
  3. Whisk your dry ingredients together in a bowl.
  4. Cut cold butter into your dry ingredients until you get a crumbly mix.
  5. Mix in cranberries & zest.
  6. Pour milk/egg into bowl with your dry ingredients & mix gently until dough is just wet. 
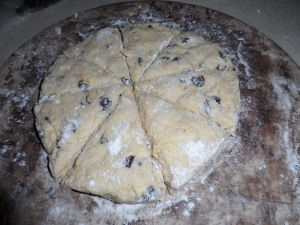
  7. Tumble dough onto a pizza stone sprinkled slightly with flour.
  8. Form into 8 inch round by 1 inch deep.
  9. Score into eight equal pieces.
  10. Bake 30 minutes. Remove when golden brown & crusty all around, on top and in between each slice.
  11. Allow to cool before drizzling with glaze 
  12. Lastly ~ Enjoy! ðŸ™‚
Mmm Mmm Good!
Sink your teeth into a version of your own & come back to share!
SAM_0687
By the way, this was my first time to make scones.
I thought my batter was too wet.
Trust me, it was not.
The wet batter cooked to perfection leaving a toasty light brown outside and crumbly inside!
Lately, I’ve become infatuated with all the different varieties I can make.

I followed this recipe exactly but will soon experiment with my own twists to bring you my usual #twofer ðŸ™‚ SAM_0693
Credit for the original gorgeous beauty goes to Steve over at The Black Peppercorn!
I’m seriously going to be stalking the recipe isle. 
Head over and say Hello!
Til Next Time ~
Domesticated Rebellion
THRIVING ~ Have you witnessed the testimonies? It’s not about weight loss; it IS about feeling better from the inside out! If interested I would love to help you! Knowledge is Power! Sign-up for a FREE account & information at https://domesticated.le-vel.com
DISCLAIMER: This post may contain affiliate links meaning if you click & buy, I may be compensated. So, Thank you!

Tuesday, August 7, 2018

Baked Potato ~ Restaurant Style


Baked Potato ~ Restaurant Style


Truth be told... This is only restaurant style by looks. 
Restaurants have huge ovens and warmers to do mass quantities of potatoes at one time; 
I, on the other hand prefer to use my microwave

Problem with the microwave is it seems to dry out my potato. 
It's not fluffy. The outside becomes tough and chewy. In other words ~ YUK!

Then I read how to achieve the same crisp outer skin like restaurants. 
A microwaved potato that is hot & fluffy on the inside and crisp on the outside.

  SAM_0412

When the secret was revealed I might have squealed just slightly at the simplicity. 
Shhhhh, that's our secret mkay? ;)

So, what's THE secret?
  SALT
That's it. Salt. 
See the picture, the outside is coated in salt after being washed. 
The salt draws the moisture to the outside and magically turns it crispy. (It's not magic, its science but hey - tomatoe tomato.) 
I mean it isn't 'fryer' crispy but it isn't tough n chewy.
 #score

All you do is pierce the skin in several places with a knife or fork, 
wash your potato, add salt to a Ziploc bag, add your potatoes and microwave! 

Actually, let your salted potatoes sit, covered with salt for at least 30 minutes. Then microwave.

 Luckily there isn't much guess work since most microwaves have a baked potato setting already programmed, so follow your microwave directions accordingly.

SAM_0415

The toppings for a baked potato are endless! 

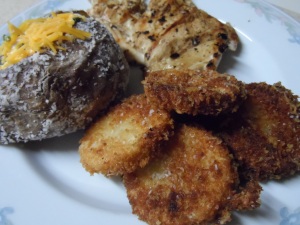
This night, I used the typical butter, sour cream, chives and cheddar 
which paired nicely with smokey grilled chicken breast and Parmesan crusted zucchini bites 
but 
full disclosure is I  have been known to go all
 fajita style or Bar-B-Que Bacon Ranch & Chicken 
making one into a full meal deal! 

#EasyPeasy


What's on your potato?

Til Next Time ~
Domesticate Rebellion

THRIVING ~ Have you witnessed the testimonies?
 It’s not about weight loss; it IS about feeling better from the inside out!
 If interested I would love to help you! Knowledge is Power
Sign-up for a FREE account & information at https://domesticated.le-vel.com

DISCLAIMER: This post may contain affiliate links meaning if you click & buy, I may be compensated. So, Thank you!
Friday, August 3, 2018

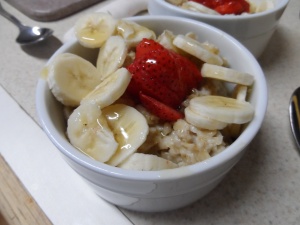
Strawberry Banana Oatmeal drizzled with Honey

Mmm Mmm Good!

I ♥ when fresh berries are in season! I try to incorporate them into meal time as often as possible. 
Most folks do this at breakfast but we're not breakfast people around here.

Correction, I'M not a breakfast person.

Correction again, I'm not a breakfast 'morning' person. 

Haha, at least I own it, right?  :)

SAM_0433

Since I'm not a morning breakfast person (coffee, YES please!) 
I enjoy making sweet but healthy breakfast dishes that 'fill us up' without 'filling us up' for dinner.

(Catch what I did there? ;) )

I think oatmeal works exceptionally well, all n all, as it is a perfectly delicious base 
helping to display your summertime sweet rewards front and center.

It's hearty, healthy and it is a snap to prepare in 10 minuets (or less)!

I used four ingredients:
  • Oatmeal (I used Quaker Quick Oats)
  • 1 thin sliced banana
  • 4-5 strawberries, sliced
  • Honey
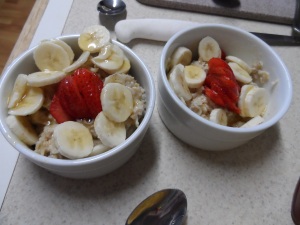
Add sliced berries to the center of the oatmeal mound, layering banana slices around outer edge. 
Next, drizzle honey over all for a light sweet addition to the oats. 

Definitely a meal deal on evenings when its still topping at a whopping 108 outside!

SAM_0437

Whew, help me I'm melting! :)

Breakfast can be made as decadent or as savory as you desire. 
Simply depends on how much time you want to spend in the kitchen. ⏰
Me, on nights like tonight - Um, no, not so much... 

Even with air conditioning, once the heat zaps you - you're just simply zapped. 

So this chic is gonna re-hydrate, replenish and relax with hubs! ♥

SAM_0436 

Dinner has been served! 
  
We also included a couple slices of buttered toast along side our bowl of goodness. 
Add pecans, cranberries, blueberries, bacon :) ~ whatever your hunger craves.  

What is your favorite breakfast meal to make for dinner?

Til Next Time ~
Domesticate Rebellion

THRIVING ~ Have you witnessed the testimonies? It’s not about weight loss; it IS about feeling better from the inside out! If interested I would love to help you! Knowledge is Power! Sign-up for a FREE account & information 

DISCLAIMER: This post may contain affiliate links meaning if you click & buy, I may be compensated. So, Thank you!
Monday, July 30, 2018

Strawberry Cucumber Salad

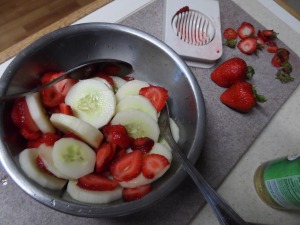
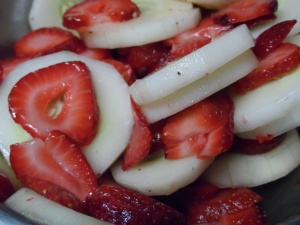
Strawberry Cucumber Salad tossed in Honey & White Wine Vinegar

Have you heard? I can grow a badass cucumber! It all started in the compost...

...I'm one of those people who will see something in a picture and more often than not, convince myself 
"Hey, I can do that!",
 and off I set to do 'whatever' without really researching the 'how to' behind the project... 

Sound familiar? Know anyone else like this? 

Well in this instance, it was composting
I mean seriously, how hard can it be to allow stuff to decompose, Right?  
So I built a box out of pallet leftovers setting a drum from an old washing machine in the center to hold my 'stuff'. 

cucumbers

Making sure the cover would lock to keep critters out, ensuring airflow ~
I felt good about my recycling endeavor and started filling the drum with kitchen scraps & garden trimmings,
 turning it daily as I had interpreted from the pic. 

Payday happened at the beginning of Spring 2018 when my efforts were rewarded with beautiful black rich soil! 
I was so excited at my success! :)

WHOOT! 

As soon as it was warm enough that black gold was spread over every single raised bed, 
used in all my pots and even layered in some ground areas. 

Anticipation grew as I soon started seeing little sprouts everywhere. 

Yay! I was all happy with myself; maybe I do have a green thumb... 
HaHaHa, If Only! 

Ya see, all the sprouts were IDENTICAL. 
Every pot. Every bed. Every spot I used my black gold had the exact same sprout. 

Each sprout I have since learned was a cucumber! (a few were cantaloupes)

Apparently, I need to research more about composting because when I discarded my cucumber vines
with some cucumbers last year,

:( the seeds did not decomp as I expected :(
and were dispersed throughout my entire garden this year! 

SMH! Imagine my surprise when cucumbers started coming up where I had planted corn! 
And cantaloupe! 
And tomatoes in my potatoes! WTH? 

It's funny now :) but I've had to do some serious searching for cucumber inspired recipes...

Thus, bringing this ingenious lovely into my life! Simple, easy, 4 ingredients! Think of it as 'Summer in a Side'!

SAM_0429

Ingredients:
  • 1/2 cup Honey
  • 1/8 - 1/4 cup White Wine Vinegar
  • 1 large Cucumber
  • 1 pint Strawberries
Mix vinegar & honey in a small bowl. 
I suggest this motto: "Less is Best, Taste as you Go" 
to ensure the vinegar isn't overpowering the sweetness I started with 1/8 cup and continued until it fancied my flavor! ;)
Peel and slice your cucumber into rounds
Slice the strawberries after washing and removing stems, adding to bowl of cucumbers. 
Pour the honey mixture over the fruits, tossing 
gently to dress each slice. 
Cover and chill before serving.

SAM_0431


SAM_0433

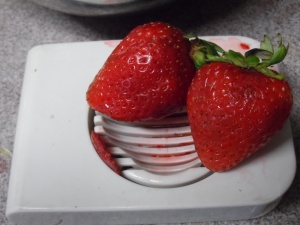
Oh, food for thought: to cut small fruits like strawberries, olives, or mushrooms 
~ I ♥ this ~ 
Works Perfectly so hands of grands can assist without concern of cutting themselves!

Surfing through Pinterest as I usually do for inspiration I stumbled across a pin that led me to Karen over at   https://thefoodcharlatan.com with her re-make from the cookbook Our Sweet Basil Kitchen by Oh Sweet Basil
Both recipe curators use balsamic for this dish. I chose white wine vinegar as it has less bite IMO compared to balsamic versions. 
But don't take just my word, you should try all three for yourself!

Til Next Time ~
Domesticate Rebellion

THRIVING ~ Have you witnessed the testimonies? It’s not about weight loss; it IS about feeling better from the inside out! If interested I would love to help you! Knowledge is Power! Sign-up for a FREE account & information 

DISCLAIMER: This post may contain affiliate links meaning if you click & buy, I may be compensated. So, Thank you!
Thursday, July 26, 2018

No Regrets; creating a better hindsight.


No Regrets; creating a better Hindsight!


I was thirteen years old when he had a heart attack. He was lying in the small circular patch of grass that divided the two roads in our neighborhood. No one knew what to do, except me. Everyone just stood around. Or maybe there wasn’t anyone. Maybe it was just me standing there. And now I had a choice. A choice that would change the course of my life in a direction I never anticipated. I could let him die or I could start CPR.
While waiting on the paramedics, I started performing CPR on my father.  I’m sure it was only for a few minutes, but it felt like forever until someone more experienced arrived on the scene and took over. He was breathing they confirmed. His heart was beating irregularly but nonetheless, beating. The man in uniform looped a tube around his head placing a mask over my fathers mouth and nose, rolled him onto a stretcher and transported him to the local VA.
There, people were telling me I probably saved his life. He would be so proud of me. I should be proud of myself. But that isn’t how I felt. I wasn’t proud. I was angry. A deep rooted resentment that surfaced after making the choice to save him.
I have written about time. How fleeting it is. How our tomorrows become yesterday before we even realize it & what we do today will affect us in one way or another tomorrow. Which tomorrow you might wonder? I can’t say, nor can anyone predict.
My tomorrow came years and years later.
I was sitting in the lawyers office with my mother. His secretary showed us into a large conference room and asked if we wanted anything to drink. He would be with us shortly she stated. The room was quiet. My mother sat on one side and my eldest son on the other. A few minutes later a folder of documents was placed before me. The first document was a durable power of attorney naming my mother to make decisions on his behalf. That was normal. Then I read the next paragraph…. in the event she was not able or unwilling… I turned the page and read my name.  Oh Hell No! Me? ME.
My heart started racing. Why me? What the hell was he thinking? I could name a dozen reasons why I, of all people, should not be the one to care for him. I should not make choices on his behalf. My youthful anger that had long ago subsided to a low simmer was now raging at full boil. I had dealt with ‘our’ life. Or so I thought.
The next 6 months proved to be heart wrenching. I witnessed the dominant influence in my life succumb to dementia. I witnessed his struggle in trying to understand what was happening to him. I watched the confusion in his eyes flicker between thankfulness to concern, sometimes convinced I was lying to him about events.
He was never mean to me nor was he ever violent. Because of those two realizations, I found myself fighting FOR him. Struggling to grasp my responsibilities versus my own emotions. Selfish emotions. But emotions I was entitled to feel and no one blamed me. I watched as he returned to a child-like state of mind. But before he regressed, he became my dad.
The day after Mothers day 2012 he had another heart attack. As I look back, I have zero regrets in my acceptance of responsibilities to be his voice. I did not use the powers granted to get back at him. Instead, I used it to love him. To love him again as I once did – innocently.
Sometimes life just doesn’t make sense. Sometimes things happen that we are not in control over and how we respond today determines our fate tomorrow. If you do not already, I encourage you to review your angle on life. Your next steps. Do you consider your tomorrows? Do you ponder what the future holds? I can honestly say I did and because I did, I look at yesterday and can genuinely smile.
I hope each of you gain what I consider now as my ‘gift’. To be able to look ahead just enough to ensure when you look back, you too can genuinely smile.
Til next time~
Domesticated Rebellion


THRIVING ~ Have you witnessed the testimonies? It’s not about weight loss; it IS about feeling better from the inside out! If interested I would love to help you! Knowledge is Power! Sign-up for a FREE account & information 
  • DISCLAIMER: This post may contain affiliate links meaning if you click & buy, I may be compensated. So, Thank you!
Crunchy Zucchini Bites

Crunchy Zucchini Bites

Have you noticed summer is here?

I assure you it is peaking in my neck of the woods.  Bringing record-breaking, scorching, hell-like heat with it too! WOW! Sadly, for many of my garden edibles the heat has been nothing less than brutal. The increased temps left me just a single zucchini ready for picking this morning.

Hmph! Nature can be a beast sometimes.

Being this beauty was good size I decided I wanted to stretch it between the hubs & I as a side.

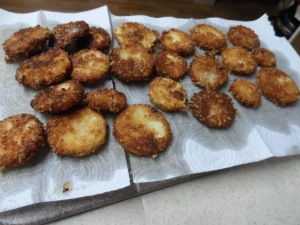
And I Did! Just look at these crispy bites of yum! Here is how I did it:

  SAM_0407
  • 1 zucchini
  • 1 cup vegetable oil
  • 1 1/2 tsp garlic powder
  • 1 cup panko bread crumbs
  •  2 eggs, beaten
  • 1 cup all-purpose flour
  • 1/2 cup grated Parmesan cheese
  • salt/pepper to taste
  1. Peel zucchini then cut into 1/8" rounds
  2. Grate 1/2 cup parmesan cheese into the Panko, add garlic powder & mix well
  3. Beat 2 eggs
  4. In a fry pan, heat some oil to medium - high
  5. Dredge the rounds in your flour
  6. dip thoroughly in egg
  7. press into the panko parm breading mix being sure to cover each side
  8. Fry in batches about 2-3 minutes each side until the centers are soft and the outside is crispy, crunchy golden brown .
  9. Remove from oil, place on paper towel salting to taste
SAM_0415

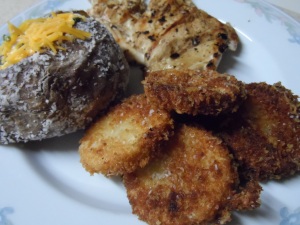
These lovelies were paired with grilled chicken, fluffy potato and out of this world crunchy zucchini bites! If you're a texture person as I am, then you will enjoy the crispy crunch ~ A total knock out thanks to the Panko (Japanese bread crumbs).

Another "Thank you" to Chungah over at #DamnDelicious for her recipe inspiration!

SAM_0439

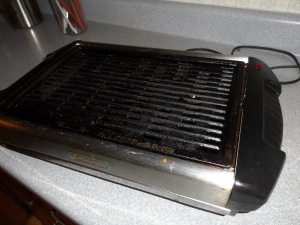
During all seasons we get to enjoy grilling thanks to my counter-top grill. Electric, removable grate & removable drip pan. ♥♥♥


Such an effective way to 71tRQFahuML._SL1500_
bring the flavors & textures of outdoors inside without feeling the heat!

If you enjoy grilling as much as I do, but don't want to melt in the rising temperatures outside, here is a newer version counter-top grill by Hamilton Beach   https://amzn.to/2LuVlpFd. 

Time to get your grill on!

Til Next Time ~
Domesticate Rebellion

THRIVING ~ Have you witnessed the testimonies? It’s not about weight loss; it IS about feeling better from the inside out! If interested I would love to help you! Knowledge is Power! Sign-up for a FREE account & information 
 
  • DISCLAIMER: This post may contain affiliate links meaning if you click & buy, I may be compensated. So, Thank you!

Tuesday, July 24, 2018

TACO Seasoning

TACO Seasoning - You make yourself!

I don't know about all y'all but I never use a complete package of store-bought Taco Seasoning. In my opinion, the flavor just isn't completely right so typically I'll use 1/2 package. While I try to save the other portion, it never happens. The rolled up package gets tossed into the trash and wouldn't you know it, I'll forget that tidbit just when I need to remember it! Calling all that have been there...

Well no more... No more will I only get 1/2 when I want it all.. LOL

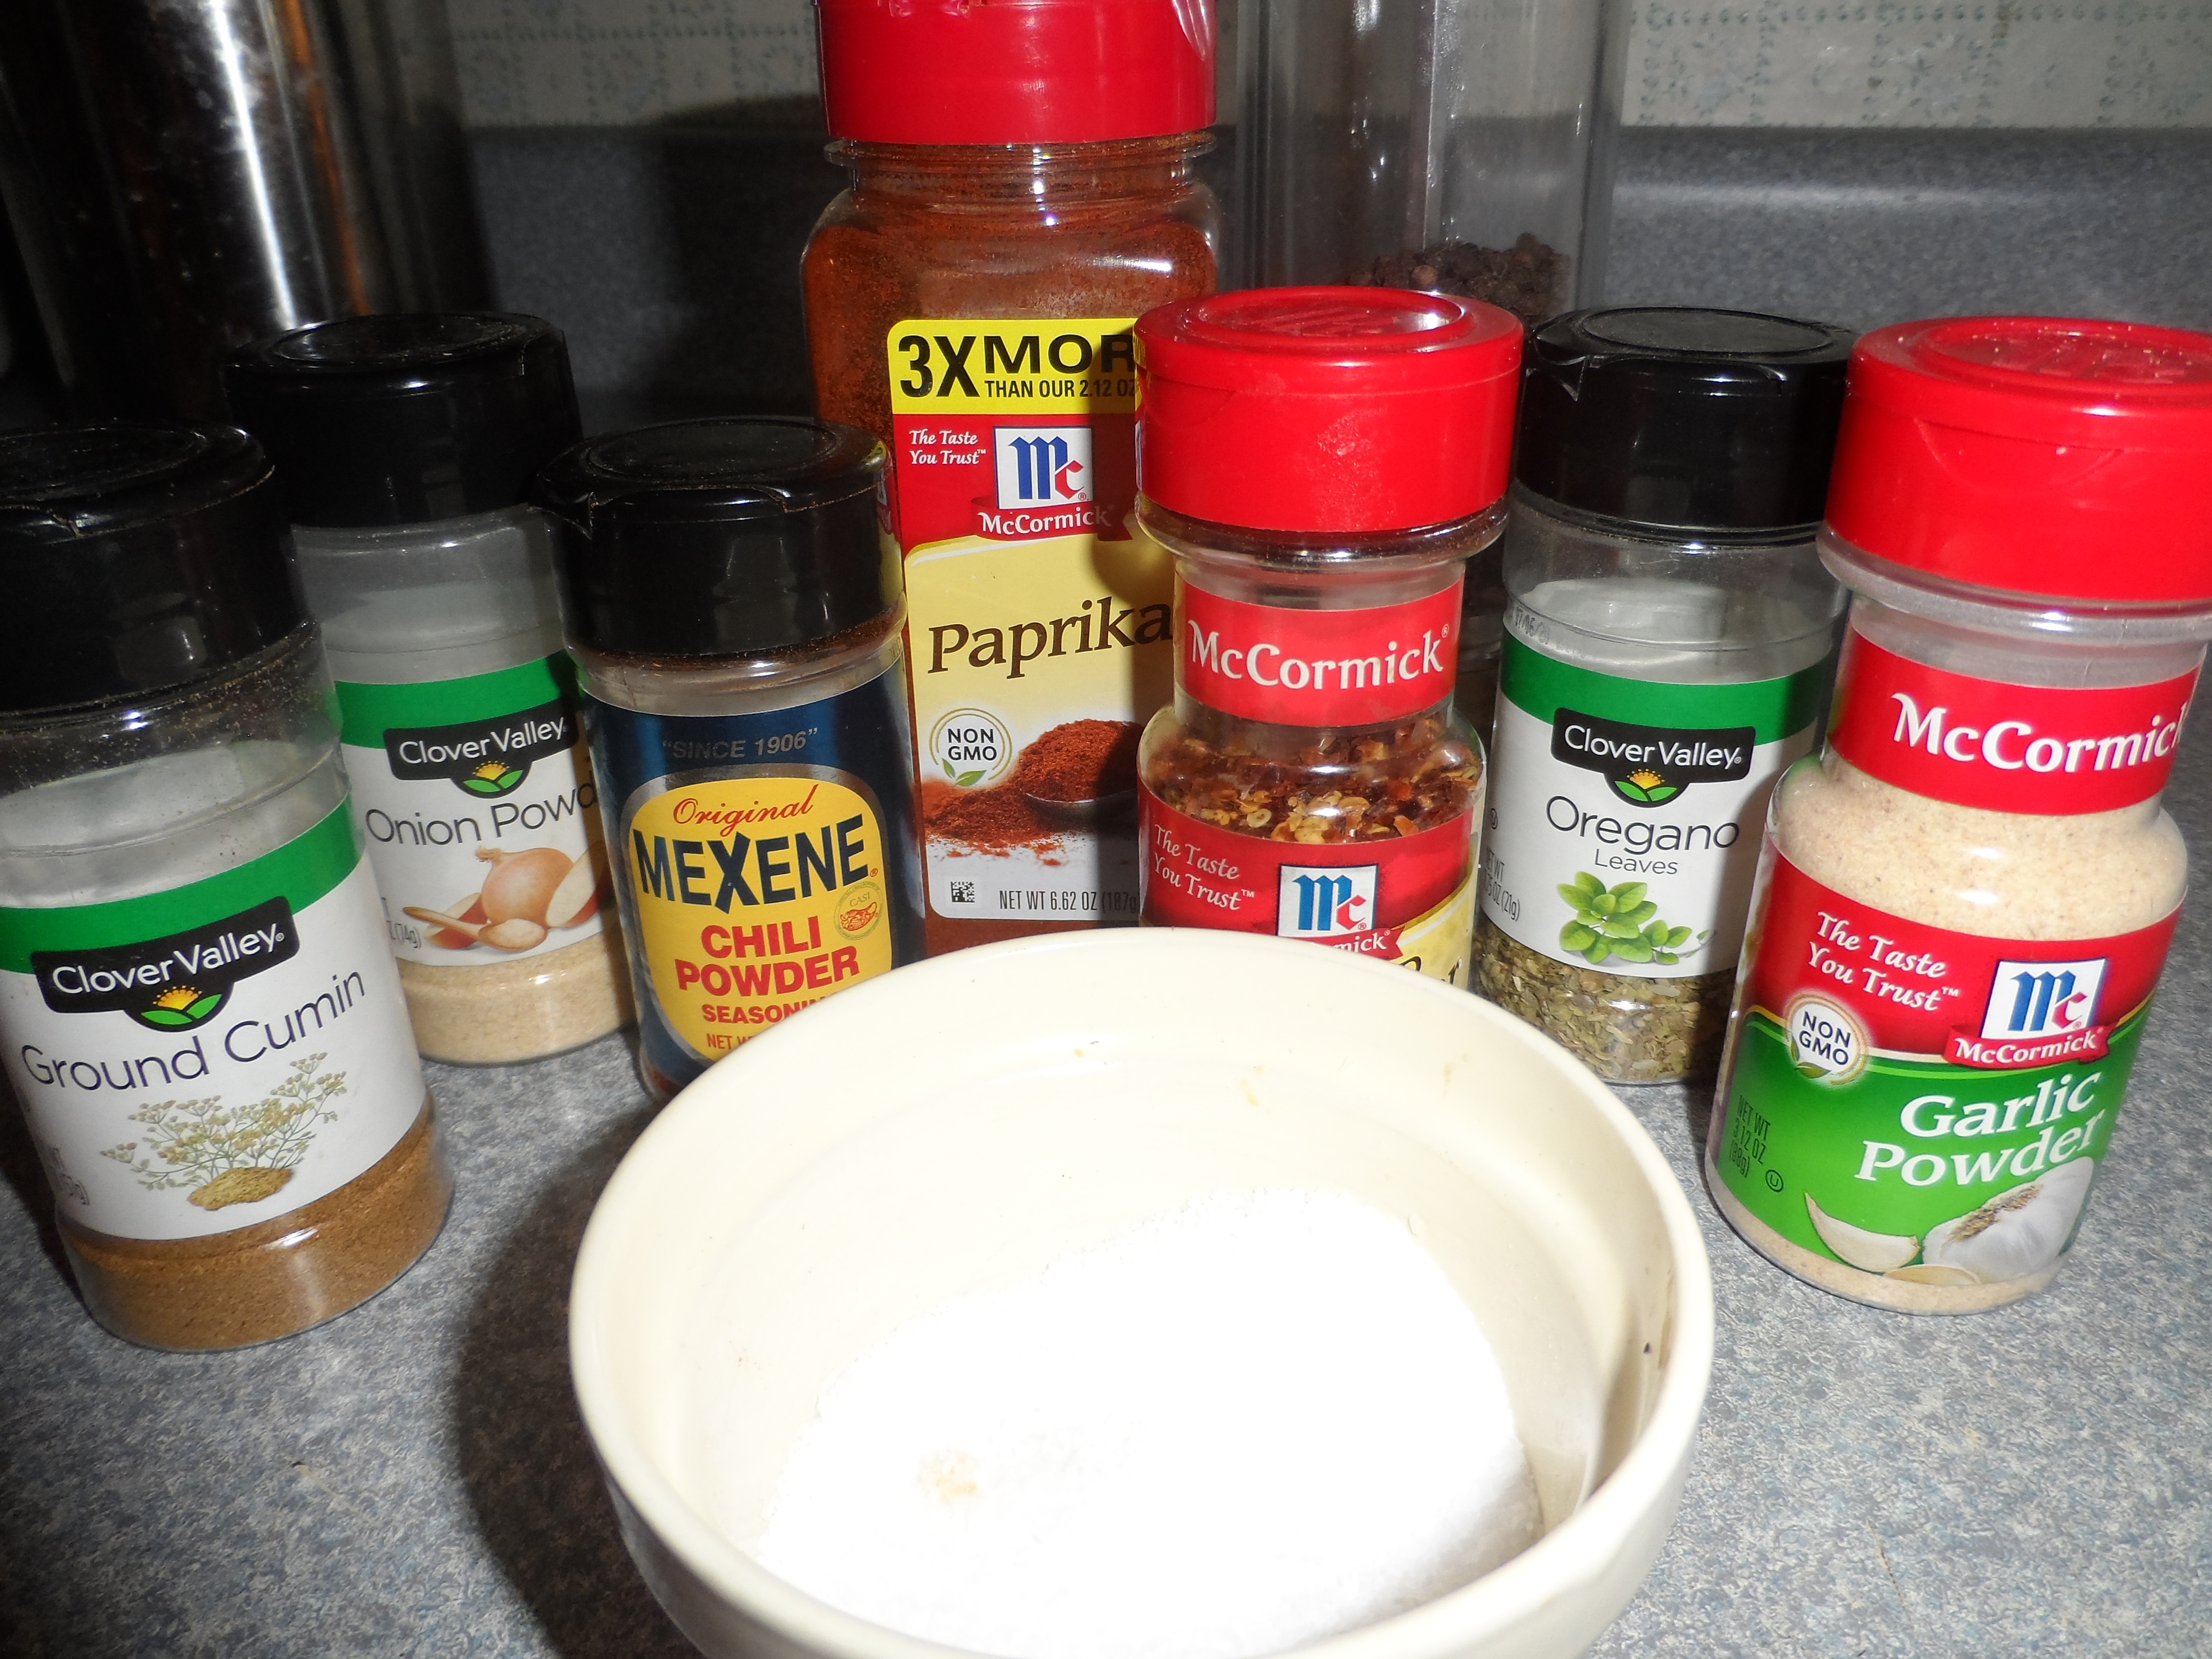
I found (and have since tested) the perfect seasoning mixture for taco meat. It isn't over powering. It isn't too spicy and it doesn't have all of the added extras you find in the pre-packaged version.

SAM_0376

Ingredients:
  • 1/2 tsp Garlic Powder
  • 1/4 tsp Onion Powder
  • 1/2 tsp Oregano, dried
  • 1 tsp Black pepper
  • 1 tbsp Chili Powder
  • 1/2 tsp Paprika
  • 1/4 tsp Red Pepper flakes
  • 1 tsp sea salt
  • 1 1/2 tsp ground Cumin
Mix everything together then add a tablespoon at a time to your Taco meat, taste testing as you go.

I used 2 tablespoons on Taco Salad for the hubs & I which was perfect!

Do you have a spice blend preference for your kitchen? If you are new to the spice world as I was, you may appreciate this beautiful House of Spice - 33pc Ultimate Organic Spice started gift set in a beautiful gift box. A perfect gift for your home cook! Check it out here.

Til Next Time ~
Domesticate Rebellion

THRIVING ~ Have you witnessed the testimonies? It’s not about weight loss; it IS about feeling better from the inside out! If interested I would love to help you! Knowledge is Power! Sign-up for a FREE account & information at 
  • DISCLAIMER: This post may contain affiliate links meaning if you click & buy, I may be compensated. So, Thank you!
df3efcffc1761c6e8ed3ad864546e9d417353e545f3b07b348

Friday, July 20, 2018

Brownies from Scratch


Brownies from Scratch

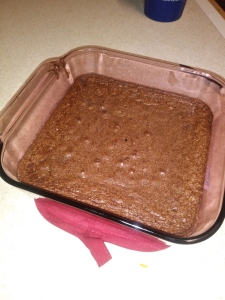
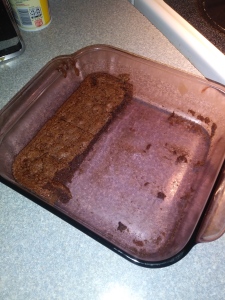
Dudes -- the #twofer for Brownies from Scratch recipe is 1st a wonderful fudge type brownie (right out of the oven) OR 2nd let it stand for a moist cake like consistency when left to completely cool. Two results - One recipe! #Score

Anyway you like it ~ Anyway you want it ~ there simply are not any wrong answers here!  ;)

This makes one 8x8 pan. Just big enough to satisfy a hungry grand & her Papa; (plus, leaving a few for a grand breakfast the next morning!)

0713182123
Ingredients:
  • 1c sugar
  • 1/2c flour
  • 1/3c cocoa
  • 1/4 tsp salt (See Note)
  • 1/4 tsp baking powder
  • 2 eggs
  • 1/2c vegetable oil
  • 1 tsp Vanilla
Mix everything together thoroughly, ensuring there are no lumps or bumps. Spray an 8x8 pan with PAM or grease with butter. Preheat oven to 350 degrees. Bake for 20 - 25 minutes.

Note : I happen to think these were great just as they were BUT our grand is honing in her palate to which she informed me "there was too much salt". So, may I suggest a tasting before baking to ensure the salt factor isn't over powering for your palate!

And seriously, I encourage you to play around with texture & flavor by tossing in some roasted pecans, walnuts, or almonds. Another lovely combo is to swirl in 1/4 c peanut butter or chocolate chips. The options are endless!  

0714181010

Brownies from Scratch can be stored (or gifted!) by mixing-up all of the dry ingredients in a Ziploc bag. Be sure to label the outside with wet ingredients, oven temperature and timing. Perfect for a quick late night craving or as an addition to a gift basket for a new mom or college student.

I'm always searching out new recipes and while these are sure to tame the cravings of chocoholics everywhere, I came across them totally by mishap. Y'all know I go to Pinterest for inspiration from other cooks. It was there, I came across a pin for brownies leading me to www.afewshortcuts.com and Amanda who shared a different scratch brownie recipe. 

However, I quickly realized the pinned shortcut recipe wasn't the same as the recipe image that caught my eye. And full disclosure; Brownies from Scratch was copied from the image.

I sure wish I knew who to thank for sharing. If you know who curated this lovely gem, won't you send them my way? Click to be taken to the original pin.

Do you have a young aspiring cook in the family?

Stonewall Kitchen Farmhouse Batter Bowl Gift

Encourage their passion with this Stonewall Kitchen Farmhouse Batter Bowl Gift (Click Here) Inspiring breakfast everywhere!

Til Next Time ~
Domesticate Rebellion

THRIVING ~ Have you witnessed the testimonies? It’s not about weight loss; it IS about feeling better from the inside out! If interested I would love to help you! Knowledge is Power! Sign-up for a FREE account & information at https://domesticated.le-vel.com
 
  • DISCLAIMER: This post may contain affiliate links meaning if you click & buy, I may be compensated. So, Thank you!
Thursday, July 19, 2018


HOME-MADE SLOPPY JOE SANDWICHES

Easy to make, easy to serve and even easier to clean up. #Tripplehitter

Sloppy Joe sandwiches; a perfect simple dinner whipped up in no time when my babygirl & family unexpectedly came to visit for the day. I don't have to tell y'all moms how awesome it feels to have your adult kiddos want to come over 'just because'. No hidden agendas, not needing or wanting anything - just the desire to hang out. ♥

My heart ♥loves♥ visits like that!

Thinking of dinner earlier that day, I had already thawed 1-1/2 lbs of ground chuck. And while visiting & watching TV, I randomly started looking for recipes that would stretch enough to feed all of us *without* my having to run to the grocery store.

That's when Pinterest (♥) showed me a pin "The Best Sloppy Joes"! Something that was a staple for me as a child but not so much for my own kiddos when they were growing up. I can honestly say it's probably been 15 YEARS (or more) since we've had "Sloppy Joes" because my way was to use Manwich Sauce & the hubs was never a fan...

0712181757

Until now! This is a winner for dinner at my house. No lie, every one of us had second helpings of this recipe (even my most picky eater!) #winning :)

So ~ if you're looking for a meal that is hearty, easy, inexpensive, made with everyday pantry staples and let me not forget filling - then try this recipe out. Perfect for the next time you need a quick dish to satisfy the hungry mouths around your table!

Ingredients:
  • 1 lb of ground beef/chuck
  • 1 small sweet onion, chopped
  • 1 8 oz can of tomato sauce
  • 1/2 cup ketchup
  • 1 Tbs Brown Sugar
  • 1 tsp ground mustard
  • 1 tsp white vinegar
  • 1 Tbs Worcestershire sauce
  • Salt & Pepper to taste
  • Bread or Buns
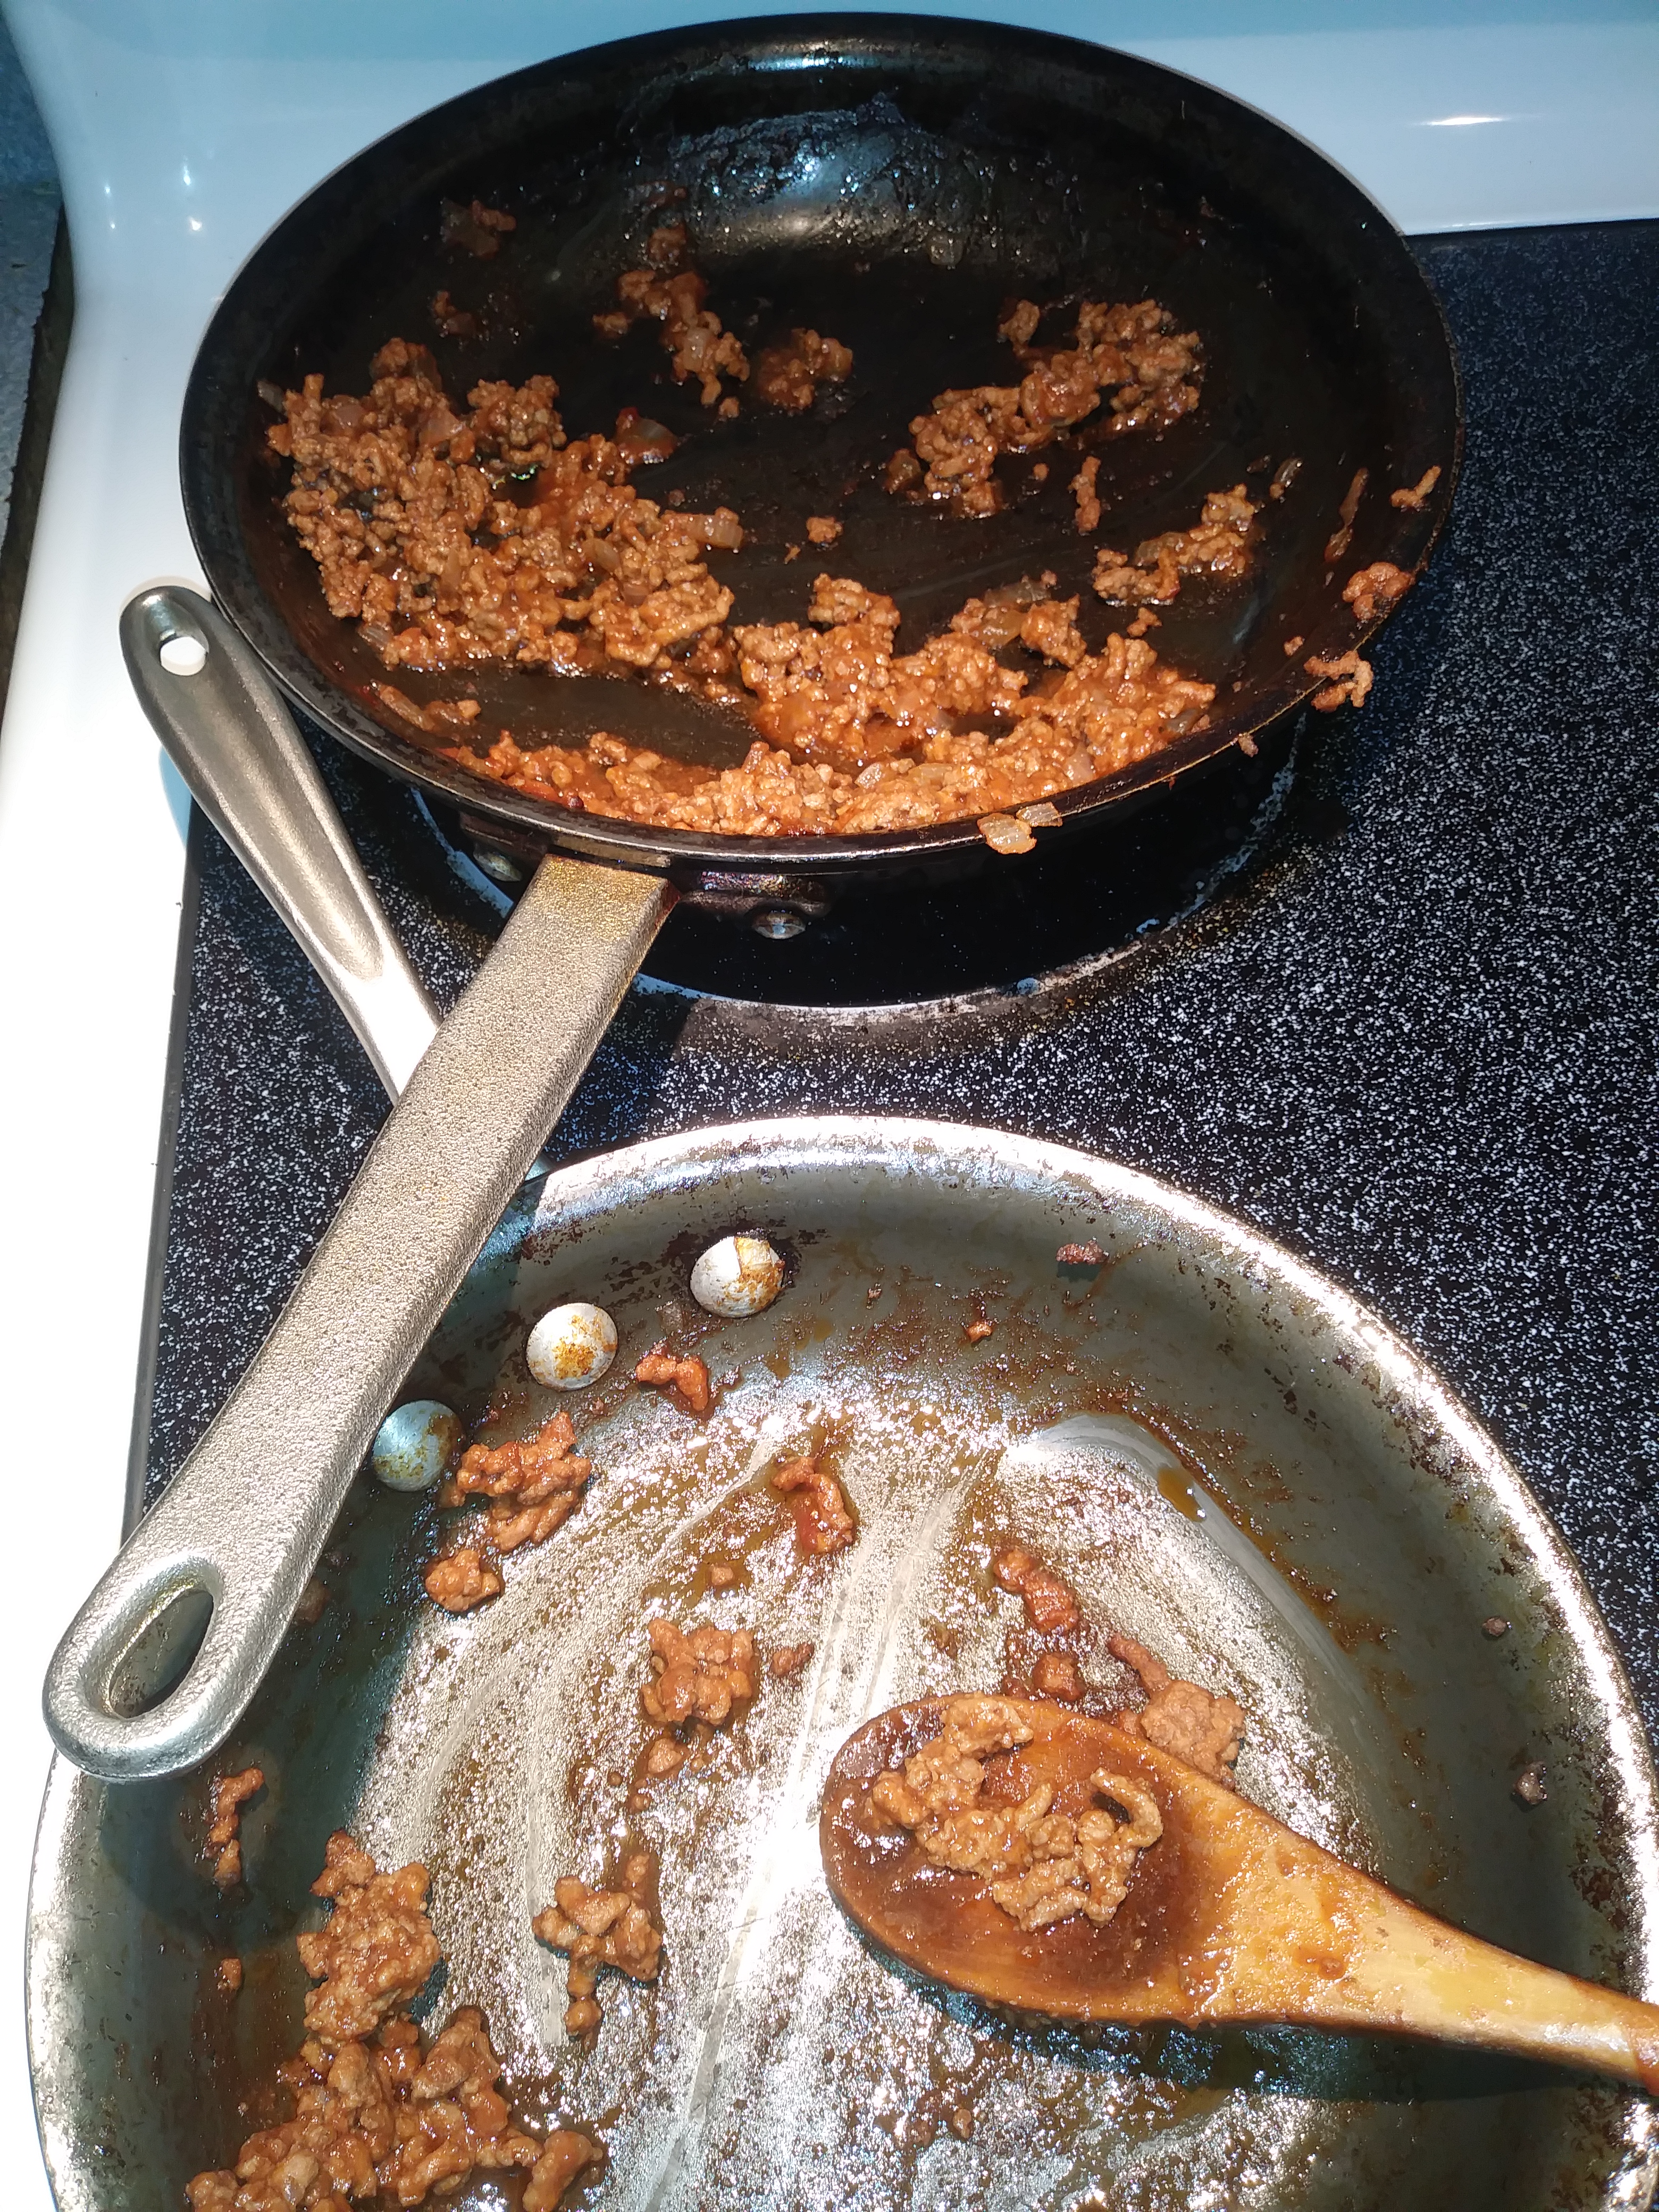
  1. Cook your hamburger meat with the onion, then drain, adding it back to your skillet. (I halved my meat as my son in-law is allergic to all things onion!)
  2. Make your sauce by mixing the rest of the ingredients in a small bowl then add to your drained meat; simmering about 10 minutes.
  3. Toast your buns (or not) & top with your favorite condiment, add some cheese (or not), then heap a ladle of the meat mix on your buns, adding to your plate chips, veggies or whatever your flavor and Dig In! (Be sure to have a napkin handy!)
I already know I'll be making this sooner than the next 15 yrs!

Note: My usual fashion is to provide #twofers; an original recipe that inspires my remake. While I can remake this adding other ingredients such as sweet peppers or garlic, I chose not to because it is incredible just as it is. Thank you Meggan for sharing this recipe! Y'all should check out her other goodies at www.CulinaryHill.com!

Tell me about a favorite of yours to make when company comes over.

Til Next Time,
Domesticated Rebellion

THRIVING ~ Have you witnessed the testimonies? It’s not about weight loss; it IS about feeling better from the inside out! If interested I would love to help you! Knowledge is Power! Sign-up for a FREE account & information at https://domesticated.le-vel.com
 
  • DISCLAIMER: This post may contain affiliate links meaning if you click & buy, I may be compensated. So, Thank you!


Cinnamon Rolls ~ Old School Recipe


Cinnamon Rolls ~ Old School Recipe

A single place where good & gooey and sweet & sugary combine together with unforgettable buttery flavor.

36254916_10211428705136646_4452179037657235456_n

Impressingly it was pure nostalgia coming from my oven the afternoon I decided to try these on for size. A whiff of reminiscences crepted thru my kitchen to fill every room in the house. Provoking memories of yester-year while inticing current hunger... and, instead of satisfying that hunger with something resembling lunch ~ I waited.  I waited for these beauties to be done. Correction: WE waited.
Um... Dare I testify: "don't do that!" For Realz! This is NOT one of those "do as I do" moments. Otherwise you will accidentally eat them all like we did! (well, almost all) #sugarrush
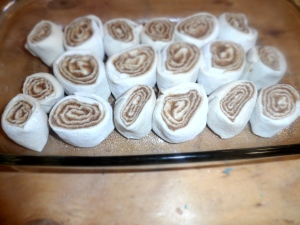
I'm not sure "how old" equals "old school" either but if you are, let's say, 30 years or older then you might recall when fresh hand-made cinnamon rolls were actually rolled out by your cafeteria ladies. SAM_0049

They were one of the best things about school.

Of course, this was wwwwaaaayyyyy before we cared about the calorie intake of our student body. When pizza was tasty, sloppy joes were greasy and whole milk was available in white and chocolate! Before the public school lunches were hijacked.
Oh, how I recall wheeling & dealing for any extra cinnamon rolls too. I'd wipe tables, put up trays, stack chairs. #MmmMmmSoGood

My fave way to eat them was to unwind each roll so I could enjoy the soft tender dough, layer by layer. Occasionally, anticipation or lack of remaining lunch time would force me to simply sink deep into the center, combining all of those layers into a single sticky mouthful! Either way, I always tasted the sugary glaze first, followed by nuttiness of pecans ~ a slight sweetness from the dough ~ 

ending with a buttery, sugary, cinnamonSAM_0051

burst bouncing over my taste buds beginning at the tip of my tongue with each bite.
In my opinion, even the cinnamon rolls sold at the State Fair are not as good as the ones from school 'back in the day.
So if you're ready for your taste buds to take a trip down memory lane (or simply want a bomb ass cinnamon roll, head to the pantry with this recipe in hand:

SAM_0052

Dough Ingredients:
  • 2 pkgs. yeast
  • 2 cups warm milk
  • 1/4 cup plus 1 tbsp brown sugar
  • 1 tsp salt (omit if you use salted butter)
  • 2 tbsp softened butter
  • 5 cups all-purpose flour (for softer dough add 1 egg & increase butter to 1/4 cup)
Filling:
  • 3/4 lb butter
  • 1 1/3 cups sugar
  • 1 1/2 cups brown sugar
  • 3 tbsp cinnamon
Glaze:
  • 2 1/4 cups confectioners sugar
  • 1/2 cup warm water
  • 1 tsp vanilla

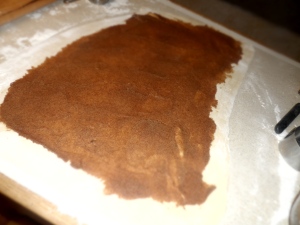
Dissolve yeast in milk. Add sugar, salt & butter. Mix Well. Add flour gradually mixing well after each addition. Knead and let rise until double in bulk. Heavily butter two 9x13 pans. Lightly oil board (or flour counter) and roll out dough into a 1/4 inch thick rectangle. Spread filling evenly over dough. Roll up tightly, sealing edges. Let rise until double.
Bake in a preheated 350 degree oven for 25 minutes.
Glaze as soon as they come out of the oven.
IMG_20180626_161306_844

I have to credit my cousin for sharing this recipe (Thanks Cuzz!) & www.cook.com
Note: I only baked 1/2 of a batch tossing the other 1/2 in the freezer without adding the filling & before the second rise.
The dough freezes well for future cinnamon roll treats! #thereisyourtwofer
Do you have a favorite from past school days? Yeast Rolls were my #2!

Til Next Time ~
Domesticate Rebellion

THRIVING ~ Have you witnessed the testimonies? It’s not about weight loss; it IS about feeling better from the inside out! If interested I would love to help you! Knowledge is Power! Sign-up for a FREE account & information at https://domesticated.le-vel.com
 
  • DISCLAIMER: This post may contain affiliate links meaning if you click & buy, I may be compensated. So, Thank you!