RUSTIC PIZZA DOUGH
One of my all time favorite things to eat is and always will be PIZZA!
Rather from scratch at home or dropping in at one of the popular pizza joints that are popping up everywhere -
it is one of the ultimate satisfying 'fast food' 'finger food' options I just can't say no to.
When I was younger I enjoyed thick crust pizza 'pie'. Something you sank your teeth into but could still hold with your hands; (occasionally requiring a fork.) However, taste-buds, husbands and kids bring about expansion... In this instance, expanding my tastes and ultimately my hips therefore thin crust became a fave. ;)
Specifically we enjoy a crust so thin it has rips and tears from being stretched! It has burnt edges with bubbles filled with air that
crunch noisily when bitten into.
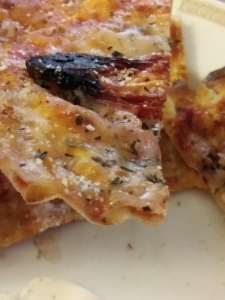
Mmmm, do you see that?
That crunch?
Paper thin and so so good.
Even though I know we eat initially with our eyes - let me assure you the taste is even better!
Previously I found a nice enough "10 minute" dough recipe;
Fast & easy but it had a 'chew' versus a 'crunchy bite'. So where do I go for inspiration?
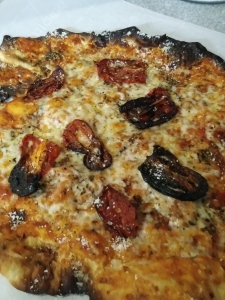
-to pinterest ♥ and the net-
Where I found the perfect Rustic Pizza Dough that if you have time to wait on its rise, you will absolutely fall in love with the authenticity!
Let this transport you to the outside patios of Italy. I've made it as far as my porch.
Perhaps you'll make it to Italy for me! LOL
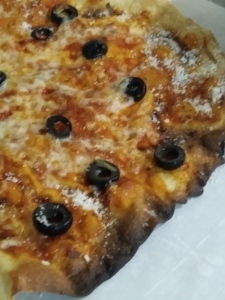
Typically, when we have pizza night at our house, it's usually hand in hand with having a few grands over.
I recall pizza dough being the first thing we attempted to make with our first grand little.
Something 'hands on' allowing lil fingers to play, all while being in the midst of what was happening in the typical hub of the home; AKA the kitchen!
I personally do Mise en place (French pronunciation: [mi zɑ̃ ˈplas]) which is a French culinary phrase meaning "putting in place" or
"everything in its place."
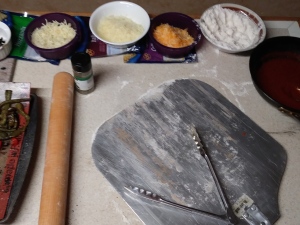
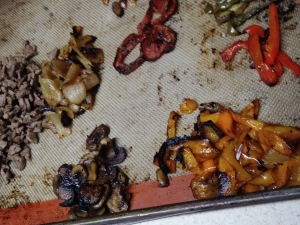
I gather everything up that I will need before starting, including the various topping
s that will be used.
I pre-cook most toppings too since the time in the oven isn't really long enough to accommodate.
Of course, this is entirely personal preference - so feel free to rock out your own.
That's exactly what I do!
Crust Ingredients:
- 5 cups AP flour (approx) + some for dusting
- 1 1/2 tsp active dry yeast
- 1 1/2 tsp kosher salt (original calls for sea salt)
- 2 1/4 cups COLD water (yup, COLD)
- 1 tbsp EVOO
While gathering the ingredients, that is a good time to start pre-heating your oven to a min of 500 degrees.
The original recipe and my own experience concur a pizza stone makes all the difference too.
Be sure to have yours in the oven during the preheat process.
I used a kitchen aide mixer but not to fret, this can come together by hand nicely too.
So use what you have - it's really hard to fudge this one guys! :)
Incorporate all dry ingredients
together then add COLD water. TaDah!
No proofing necessary! (That's a win win in my book!)
Mix, adding additional flour as needed. The dough should be slightly sticky
but not enough to remain on the side walls of your mixer.
It'll take between 8-12 minutes to combine.
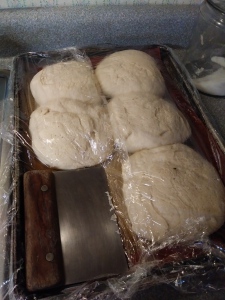
When finished, remove the dough and cut into 6 rounds.
Don't worry about extras -- this recipe freezes exceptionally well!
Place the rounds on a cookie sheet, drizzle with the EVOO, cover with plastic wrap or a damp cloth and walk away.
Not really 'away' but let it rest for an hour or so in a nice warm spot.
The yeast will activate surprisingly well, doubling the size of each round. This time allowance gives ample opportunity to pre-cook your toppings if your into that kind of thing.
Once the dough has risen, take out one of the rounds to work while keeping the others covered.
This will ensure they do not dry out.
Use a slight dusting of flour on your counter to roll out your dough the size of your pizza peel.
and dust your peel so the dough will slip off onto the stone without sticking.
Pre-bake each crust at high temp for 1-2 minutes to ensure a crisp crunchy texture before adding any toppings.
It is seriously worth the minimal effort!
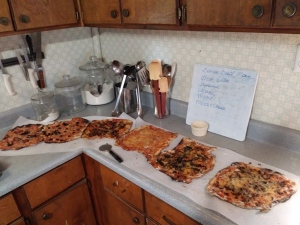
Remove the pre-baked crust from the oven. Keep in mind Less is More if you desire crisp & crunchy!
Use your favorite sauce, prepared toppings & choice of cheese then back into the oven between 5-7 minutes.
Bam! Dinner Is Served!
What is your favorite pizza? Do you prefer thin crust or thick crust?
Did you know pizza is a fabulous way to use left over meats, veggies and the last tidbit of various cheeses?
Is there a special recipe you do with your littles or grands?
Let me know how it goes in your kitchen!
Shout out to Ciao Florentina for the original recipe posted in 2011 at https://ciaoflorentina.com/about-florentina/ who shares her journal of simple living, filled with joy, laughter and sinfully delicious recipes!
Til Next Time ~
Domesticate Rebellion
Domesticate Rebellion
THRIVING ~ Have you witnessed the testimonies? It’s not about weight loss; it IS about feeling better from the inside out! If interested I would love to help you! Knowledge is Power! Sign-up for a FREE account & information at https://domesticated.le-vel.com
- DISCLAIMER: This post may contain affiliate links meaning if you click & buy, I may be compensated. So, Thank you!


